Hello! Here's a super-quick card I made for my nephew's birthday. I used a Darkroom Door robot photo strip that I had on hand and paired it with a Darkroom Door word strip. The background is a seafoam glimmer paper, run through a Tim Holtz cogged wheel embossing folder. I coloured in some of the depressions with an avocado marker to give it a bit of interest, and added some black liquid accents (Ranger) here and there for a finishing touch. The card base is Dusty Durango (SU). Speaking of SU, have they retired Bordering Blue? I couldn't find it on their website. I use this colour all the time, and frankly find it quite astonishing that they discontinued it without consulting me, their largest volume purchaser of that colour. Now my remaining stock will have to go into perma-hoard status, never to be used again since it's the last I have (along with Purely Pomegranate and Soft Sky) until Future Karen no longer likes those colours and wishes she'd used them when she loved them. Too bad Future Karen isn't here to give Present Karen a swat upside the head for that! I'm sure if Future Karen were to come back in time to today, she would have better things to admonish me for, like spending more time stamping and less time doing laundry, etc. And bring me winning lottery numbers for next week and things like that. I would put up a with a few swats in the head for that!
Thanks for stopping by!
Saturday, 28 January 2012
Saturday, 21 January 2012
Birthday Card
Hello! Here's a card I made today for my brother's birthday. He's an avid video gamer, so I thought this would be a good card for him. It's a Sunshine Designs image, one of a set of four. I stamped it on watercolour paper and embossed it, then watercoloured it with Tombow markers, and accented with Stickles. I added in some sound lines and Batman-style "pops" "bzzts" and "zaps" for the sound effects. The background paper is from the Marrakesh pack of BasicGrey accent papers and the background stamp is another Sunshine Designs cube. The card base is Mellow Mossand I added a final accent of dimensional pearls (Ranger) in Denim. A quick card that was good for using some paper scraps. The longest time is figuring out the layout. It's also quicker to decide on the paper and then choose the marker colours. Edited to add: This is more vibrant in real life but Sauron the Scanner hates me and refused to cooperate. I tinkered with my photo editing software to the full extent of my patience to no avail. You'll just have to picture it brighter :-)
Thanks for stopping by!
PS A huge thank you to the ladies who came out to my calendar class at Heather's Stamping Haven last week. I had a wonderful time!
Thanks for stopping by!
PS A huge thank you to the ladies who came out to my calendar class at Heather's Stamping Haven last week. I had a wonderful time!
Saturday, 7 January 2012
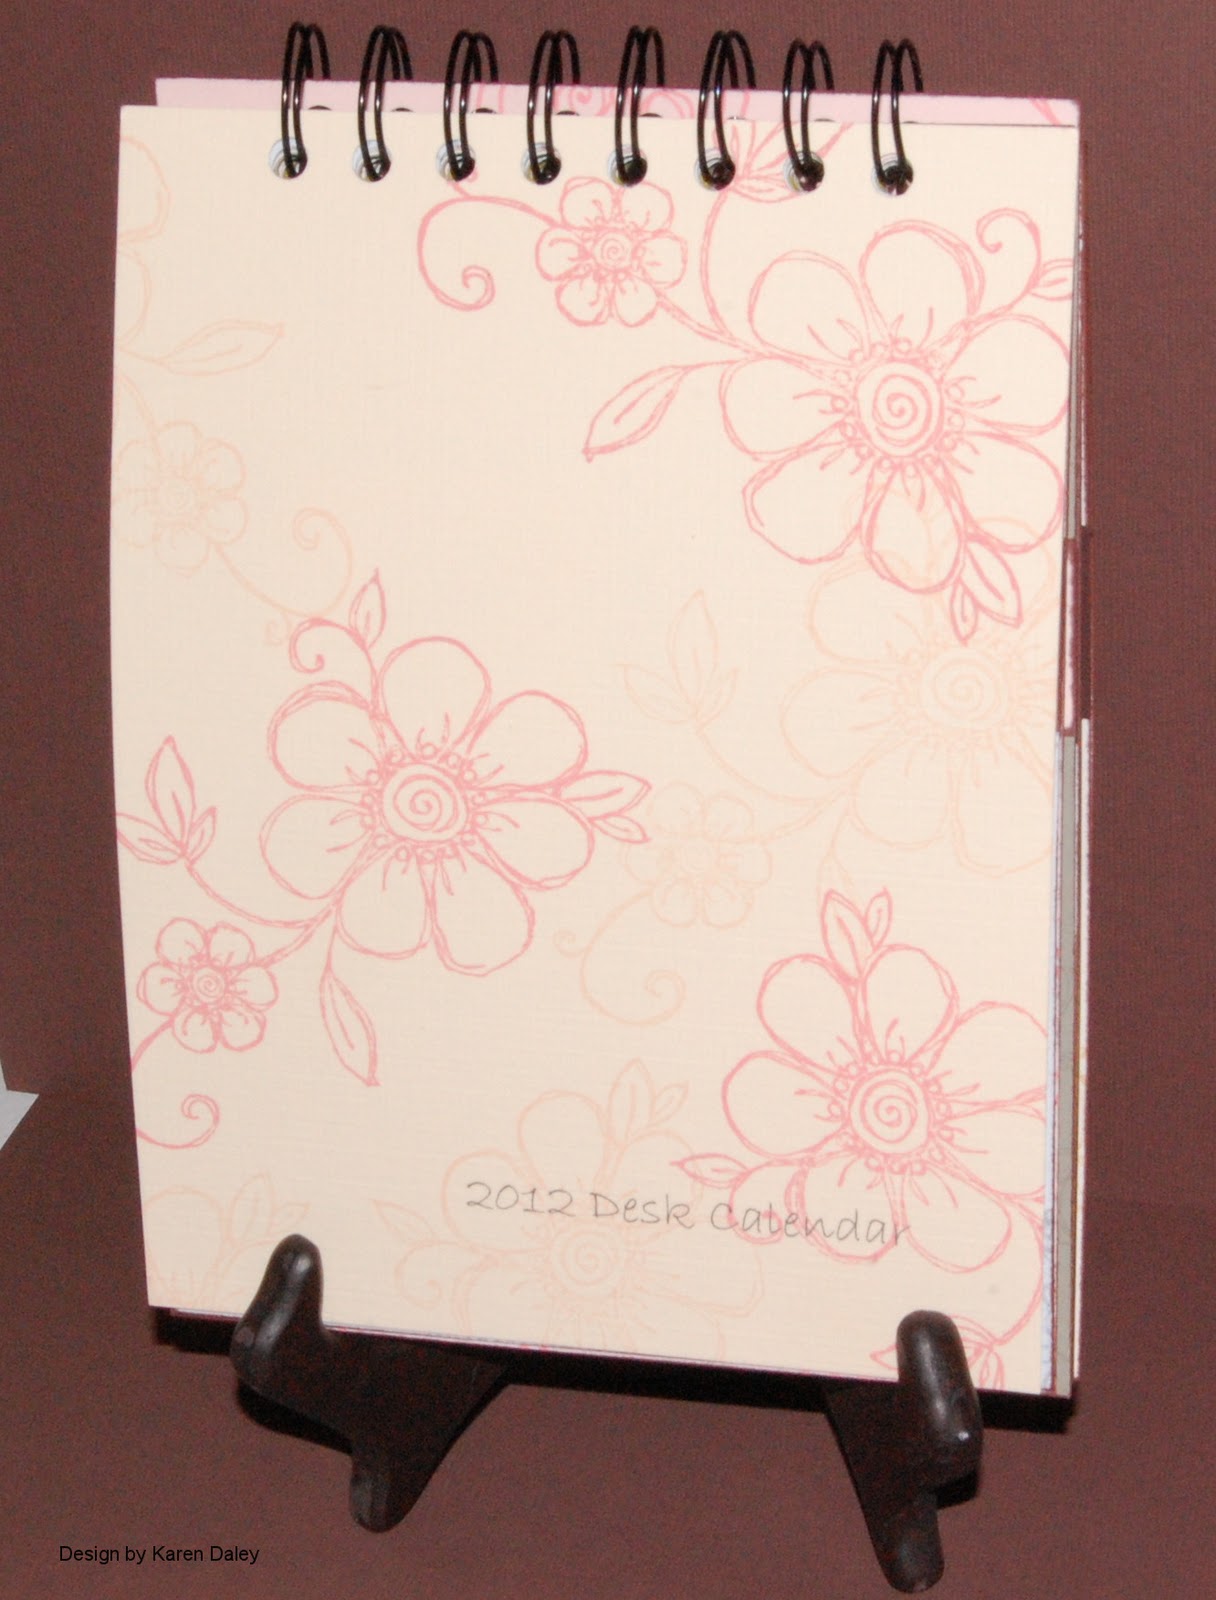
Calendar Class
![]() |
| Calendar - closed |
In the morning, we will do the images and you will learn the essentials of Krista Schneider's popular technique for watercolouring with Tombow markers. In the afternoon, we will make the calendar pages and assemble the calendar.
![]() |
| Calendar open to January 2012 |
![]() |
| Calendar Pages |
I really had fun making this calendar and I would be hard pressed to pick a favourite page. I think I could narrow it down to three contenders: the bunny, the witch, and the poppy. I used Sunshine Designs and Heather's Stamping Haven images as they lend themselves so well to the technique, but also because there is tremendous variety to choose from, seasonal and floral and birds...gorgeous. This calendar also has two bonus pages for 2013, which presented some challenges to DH to understand (in his engineer's world, calendars have 12 months you see). I said it was because years are only randomly selected points in time, roughly timed to include one trip around the sun and any old pope can make one up. Plus, we are making this later in January, so the two extra months are to make up for that. Also, a calendar that will go to February will allow people to purchase their 2013 calendars at deep discounts in February, thus offsetting the cost of the class. He remained unconvinced. I, on the other hand, thought it was great to be able to include the extra months, which is the whole reason you *make* things, not buy them, because then they get to be how *you* want them.
Hope to see you at Heather's on January 14th! It's going to be a great class and a lot of fun.
Thursday, 22 December 2011
Artichoke Birthday Card
Hi! Here's a card I made recently for my husband's birthday. I needed a quick and easy masculine card, so I cast my eye over my stamps and cards on-hand and threw out that notion. It was 11 pm and a long day and I really just needed some stamping therapy, not a "requirement". My eye lit upon a Stampin' Up stamp set called Homegrown, with beautiful line art vegetables. Instantly I knew I needed to colour some artichokes, so I stamped them on a card base (naturals ivory) in India Ink and coloured them with my Bryunzeel pencil crayons in lots of different shades (green, yellow, brown, red, blue and purple). I also added a bit of shadow with a soft grey. I didn't blend with anything, just the pencils. I find if I don't get too carried away, they blend well together, and if I do get a line, I can cover it up with something darker or assist it with my finger and some firm rubbing. Besides, I wanted the variegation of the different colours to make them look more lifelike. I needed a birthday message, and once again, my eye lit upon just the thing, a wonderful script stamp by josephinekimberling for Impress Rubber Stamps. That got stamped in India Ink too, and then it made my card lopsided, so I trimmed off some "white space" at the top to get the proportions I wanted and I was away to the races. I normally like to make a card with the person in mind, and in this case I don't really have any cause to associate DH with artichokes. Instead, this card was all about just following what felt right and taking the chance that I could give it to someone who would appreciate that aspect. And failing that, not really mind if he got an artichoke card for his birthday.
Well, I'm off on holidays now, and my wenting is done for the morning. I went to my daughter's class to help them sew felt ornaments for a little bit, then I went to an electronics store to return something, then I went to get groceries. Now I'm home and about to the fruit I soaked overnight in rum into fruitcake and then do some wrapping and maybe make some peppermint bark. We'll see how long the other things take me. I'm taking two days off before Christmas to do my baking and wrapping and general getting ready.
Thanks for stopping by! Have yourself a merry little artichoke!
Well, I'm off on holidays now, and my wenting is done for the morning. I went to my daughter's class to help them sew felt ornaments for a little bit, then I went to an electronics store to return something, then I went to get groceries. Now I'm home and about to the fruit I soaked overnight in rum into fruitcake and then do some wrapping and maybe make some peppermint bark. We'll see how long the other things take me. I'm taking two days off before Christmas to do my baking and wrapping and general getting ready.
Thanks for stopping by! Have yourself a merry little artichoke!
Labels:
birthday,
Bruynzeel,
Impress Rubber Stamps,
Stampin' Up
Sunday, 18 December 2011
Christmas Card
Hello! This will be a quick post before we dash off to church. Today is the Advent Pageant - always a good time.
I was "cleaning up" the stamp room yesterday and found two of these trees stamped and embossed on watercolour paper and decided to "whip up" another two Christmas cards. I had thought I was done Christmas cards, but those were only the mailing ones. I realized I needed another 30 or so...
I had been doing a lot of red and green cards so I decided to try something else and used bluey greens, oranges and pinks here. I used Tombow markers and blended them with a paint brush. I like it for the most part, but I think the traditional colours are still my favourite. Still, it was fun to get out the new Stickles that don't get much use. The Eucalyptus, Mystic Green and Tropical Tangerine were *perfect* here and this card has more sparkle and glitz than a Vegas showgirl.
Well, I must dash and feed Thing 2. (Thing 1 is at a sleepover birthday party.)
Thanks for stopping by!
PS. Dear Santa, Please bring me a clean and decorated house, some tins of home baking (including Granny Borrowman's gingerbread please) and some clean and folded laundry. Thank you!
I was "cleaning up" the stamp room yesterday and found two of these trees stamped and embossed on watercolour paper and decided to "whip up" another two Christmas cards. I had thought I was done Christmas cards, but those were only the mailing ones. I realized I needed another 30 or so...
I had been doing a lot of red and green cards so I decided to try something else and used bluey greens, oranges and pinks here. I used Tombow markers and blended them with a paint brush. I like it for the most part, but I think the traditional colours are still my favourite. Still, it was fun to get out the new Stickles that don't get much use. The Eucalyptus, Mystic Green and Tropical Tangerine were *perfect* here and this card has more sparkle and glitz than a Vegas showgirl.
Well, I must dash and feed Thing 2. (Thing 1 is at a sleepover birthday party.)
Thanks for stopping by!
PS. Dear Santa, Please bring me a clean and decorated house, some tins of home baking (including Granny Borrowman's gingerbread please) and some clean and folded laundry. Thank you!
Labels:
Christmas,
The Artful Stamper,
Tombow markers,
watercolouring
Saturday, 10 December 2011
Holy Holly Batman!
Hello! Here's my card for the December challenge at Inkurable Stampers, theme of Holly.
Well, here's where my near fetish for holly stamps came into its own. I used a Penny Black brush stroke holly stamp for the main image, a Stamping Bella holly stamp for the background, and on another version of this card I used the Heather's Stamping Haven solid and open holly stamps.
I started off by using a layout and technique idea from my stamping friend Mary, but changed up the colour scheme a bit. I coloured a panel of watercolour paper with Tombow markers in shades of light yellow, light blue, and many greens, just scribbling on randomly. Then I spritzed generously with water and let it blend around by itself, getting a fair bit of green on my hands. (It washes off eventually. I don't want to say how long because it all depends on how much you wash your hands. I guess if you are neither a compulsive hand-washer or a germophile, it will wash off in about a day, unless you are very neat and don't get any on your hands in the first place. If you are that person, I would watch for other miracles too, like Virgin Marys in your watercolour puddles.) Ok, let the watercolour panel dry, and help it along with a heat tool if you want, once it's stopped sopping and dripping. I set it aside to drip onto my crafting rag, which helped contain the mess, and added a cheerful green to the rag. Once it was dry, I stamped with the Stamping Bella solid holly in Evergreen Bough distress ink, and also some music (Cornish Heritage Farms) in the same green. Then I ironed it to seal the deal and stamped the Penny Black brush stroke holly in black and embossed in black. Next was the message (from the Darkroom Door Dear Santa collection), but I wished afterwards I'd embossed that too. I accented it with my sparkle pen, but I still wish I'd embossed it - next time. The card base is a medium gray linen, stamped with the same Penny Black holly in Ice Jade chalk ink. The front side of the card is cut short by about 1 1/4", and a gold edge strip applied. On the inside of the card is a black linen strip, stamped with my current favourite stamp, a scripty background from Impression Obsession. I am using that stamp on everything. Everything. It works everywhere! It is the little black dress of stamps. Not that I have ever had a little black dress, or needed one, but I use the term to indicate a wardrobe staple, that can be dressed up or down, go uptown, downtown, day to evening with the right accessories, etc. Only the stamp version is much more gratifying and requires neither pantyhose or high heels. Once everything was all put together, I put some Patina stickles on the holly leaves and some Xmas Red and Candy cane stickles on the berries. Yay holly! Yay stamps! This will be a quick one to do a batch of, maybe later tonight.
Thanks for stopping by!
Well, here's where my near fetish for holly stamps came into its own. I used a Penny Black brush stroke holly stamp for the main image, a Stamping Bella holly stamp for the background, and on another version of this card I used the Heather's Stamping Haven solid and open holly stamps.
I started off by using a layout and technique idea from my stamping friend Mary, but changed up the colour scheme a bit. I coloured a panel of watercolour paper with Tombow markers in shades of light yellow, light blue, and many greens, just scribbling on randomly. Then I spritzed generously with water and let it blend around by itself, getting a fair bit of green on my hands. (It washes off eventually. I don't want to say how long because it all depends on how much you wash your hands. I guess if you are neither a compulsive hand-washer or a germophile, it will wash off in about a day, unless you are very neat and don't get any on your hands in the first place. If you are that person, I would watch for other miracles too, like Virgin Marys in your watercolour puddles.) Ok, let the watercolour panel dry, and help it along with a heat tool if you want, once it's stopped sopping and dripping. I set it aside to drip onto my crafting rag, which helped contain the mess, and added a cheerful green to the rag. Once it was dry, I stamped with the Stamping Bella solid holly in Evergreen Bough distress ink, and also some music (Cornish Heritage Farms) in the same green. Then I ironed it to seal the deal and stamped the Penny Black brush stroke holly in black and embossed in black. Next was the message (from the Darkroom Door Dear Santa collection), but I wished afterwards I'd embossed that too. I accented it with my sparkle pen, but I still wish I'd embossed it - next time. The card base is a medium gray linen, stamped with the same Penny Black holly in Ice Jade chalk ink. The front side of the card is cut short by about 1 1/4", and a gold edge strip applied. On the inside of the card is a black linen strip, stamped with my current favourite stamp, a scripty background from Impression Obsession. I am using that stamp on everything. Everything. It works everywhere! It is the little black dress of stamps. Not that I have ever had a little black dress, or needed one, but I use the term to indicate a wardrobe staple, that can be dressed up or down, go uptown, downtown, day to evening with the right accessories, etc. Only the stamp version is much more gratifying and requires neither pantyhose or high heels. Once everything was all put together, I put some Patina stickles on the holly leaves and some Xmas Red and Candy cane stickles on the berries. Yay holly! Yay stamps! This will be a quick one to do a batch of, maybe later tonight.
Thanks for stopping by!
Thursday, 8 December 2011
Bellarific Friday - White Theme
Hello! Here's my card for Bellarific Friday this week at Stamping Bella and the theme is white. I used the three ornament stamp, stamped on white linen with gold Delicata ink (fabulous stuff - so gold and great detail - I have used it on everything for the last two weeks). I re-stamped it on cream linen and cut out the ornaments to pop up. I accented with a white gel pen and then added some tape around the edge of the white linen panel topped with warm highlight glitter ritz. I accented some of the ornaments with glitter ritz too, to tie it in. Also, the polka dot ornament is paper-pieced with white linen. the panel is mounted on gold metallic and the base card is a slightly textured white metallic with gold iridescence. I stamped the base card with Stamping Bella solid holly using alabaster chalk ink. In real life it's totally fabulous but Sauron the Scanner bears me some monstrous grudge and refuses to capture its beauty for you. Trust me. Even my DH said it was really beautiful, and he's not one who's normally lavish with praise. I think I will make more of these as they are quite quick to do (minus the fiddly paper piecing, which could be achieved more quickly with the gel pen in future). I will use the narrower tape for the glitter frame next time too, but again, live and learn. I'm not displeased with this, but now that I want the narrow edge, I will fixate on that until I get a chance to try it.
I'm in full Christmas card mode right now, and finished a small batch (6) of cards from Krista's Copic class this fall (the stained glass nativity scene). I hope to post that soon, but I make no promises. I have a lot of things to do. In fact my friend and I were talking (on the chat feature of Facebook Scrabble) about how we're so very far from being ready for Christmas. I said I have to battle perfectionist tendencies and so far lowering my standards and eliminating unrealistic (i.e. any) goals has been the secret to my success. She said she will stop procrastinating. I said I planned to do that as well, but not just yet. And for the record, Facebook Scrabble doesn't take that long, I usually play a quick word before my morning shower. That's hardly encroaching on laundry-shopping-wrapping-cookie baking-gingerbread house building- tree decorating - Advent meditating-Christmas card writing time, now is it? And also for the record, I put "make Christmas cards" at the top of my To Do list every year. Stephen Covey says to prioritize, and I find that a very helpful secret to success.
Thanks for stopping by! I must go and see if I can play my X and Q!
I'm in full Christmas card mode right now, and finished a small batch (6) of cards from Krista's Copic class this fall (the stained glass nativity scene). I hope to post that soon, but I make no promises. I have a lot of things to do. In fact my friend and I were talking (on the chat feature of Facebook Scrabble) about how we're so very far from being ready for Christmas. I said I have to battle perfectionist tendencies and so far lowering my standards and eliminating unrealistic (i.e. any) goals has been the secret to my success. She said she will stop procrastinating. I said I planned to do that as well, but not just yet. And for the record, Facebook Scrabble doesn't take that long, I usually play a quick word before my morning shower. That's hardly encroaching on laundry-shopping-wrapping-cookie baking-gingerbread house building- tree decorating - Advent meditating-Christmas card writing time, now is it? And also for the record, I put "make Christmas cards" at the top of my To Do list every year. Stephen Covey says to prioritize, and I find that a very helpful secret to success.
Thanks for stopping by! I must go and see if I can play my X and Q!
Labels:
Bellarific,
Christmas,
Stamping Bella,
ultrafine glitter
Subscribe to:
Posts (Atom)