Hello! It's been a while - sorry for the absence. I have been quilting lately more than stamping and I've also been knitting up a storm. I've discovered the tremendous pleasures of knitting socks, and the even greater pleasure of wearing them.
Here is a card I made recently for a birthday celebration this week. It's an Artful Stamper image, stamped and embossed in gold. There is a bit Art Institute Glitter in the embossing powder, which gives it an extra twinkle. Not too much, but just enough. The butterflies are coloured with Tombows and blended with a paintbrush. I've accented with Stickles (speaking of - there are new colours coming out! so exciting!). The image is matted on brushed gold (should have used my perfect layers tool - doh!) and elegant eggplant. The blue accent strip is one that was lying on my desk, waiting for this card to be created. The card base is a 5 1/2" square in cherry cobbler. The accent dots are Stream Adirondack liquid pearls. I've placed the leaf so that it will be guaranteed to fold in a card (doh!) or require an enormously oversized card. These are things that could be avoided with some advance planning, but I don't stamp that way. I normally just pick a stamp, and start there, building the card as I go. I tend not to have a final "vision" in mind. How about you? How do you approach designing your cards?
Thanks for stopping by.
Showing posts with label Tombow markers. Show all posts
Sunday, 25 January 2015
Sunday, 27 April 2014
Birthday Bird

Hello! Here's a card I made for my dad's birthday. I had been mulling over different card options (masculine cards are so tricky, aren't they) and nothing was really coming to mind. I did a few trials of a stamped image on inky paper and it wasn't really "coming together". Then, that wonderful mysterious creative inspiration came into my head - what about a blobby bird card? Hmm...what about a karate bird! So I sketched one on my scrap paper and it was so cute. Probably the cutest one - that's always how it is - the first sketch is the best. Anyway, that bird was just standing there and karate is really about the movement, isn't it. So I thought, what about the bird breaking a board (pretty impressive to see your dad breaking a board with his bare hands). So I drew the bird breaking a board. Then more of that wonderful mysterious creative inspiration came into my head - the bird shouldn't be breaking a board, he should be karate chopping a birthday cake! So I redrew it again, this time with a birthday cake. Like usual, I watercoloured the image with Tombow markers and accented the picture with Stickles (Cranberry for the icing, Yellow for the flames, and some Black Diamond for the belt -ssh probably not regulation Shotokan black!)
I mounted the image on Night of Navy paper, then matted it on some citron (precious hoarded citron, only for special occasions like a father's birthday), then arranged some Basic Grey patterned paper (from the June Bug collection). The sentiment (Papertrey Ink) is stamped in Blue Iris Color Box Fluid Chalk ink. The paper is all edged in Hero Arts Wet cement (sentiment also edged in Blue Iris).
The second picture is the inside of the card, with some scraps of the paper from the outside on it. I added an inside panel so that the writing would be easier to contend with on a navy card. The sentiment on the inside is one of Heather's Stamping Haven stamps (should be available from Frog's Whiskers Ink if you are looking for it), and is stamped in Blue Iris ink too. I liked this for a birthday stamp - and it's very suitable for this particular recipient (and probably sender too!).
Thank you for stopping by! Hope you got some time to stamp this weekend too!
Monday, 27 January 2014
January Challenge #12 Happy Bird-day!
Hello! Here's my latest January challenge card, another custom blobby bird. (You can find a great tutorial on how to draw blobby birds here.) As for turning the blobby bird into a Jedi, well, all I can say is, may the Force be with you. The Force is not that strong with me, I think, as for a significant portion of the drafting process, my bird resembled Miss Clavel more than Obiwan Kenobi. In the end, it turned out ok, though, despite using the wrong colour for the sabre. (Who knew the red ones were for the bad guys? My mother, that's who - full of surprises, she is. And thanks to a friend for pointing me to the right chronicles in Star Wars lore to confirm it.). I maintain that a red light sabre was the right design choice for this card. I guess I should say also add that this birdie was inspired by Star Wars, to avoid the full wrath of the galactic empire raining down upon me.
This card is for my nephew, the second generation of Star Wars fans in the family. I hope he likes it!
A note about the illustration - I drafted it with pencil first, then went over it with Copic Multiliner, and coloured with Tombow markers. I deliberately let the red sabre run out of the lines to get the glowing effect. It's better in real life. Sauron the Scanner is a bit uncooperative. I've added some glitter pen to the sabre, but I think I will add some stickles too. Somehow Tombows need stickles like cookies need milk.
I'll try to get my January challenge back on the rails - it's sort of falling apart, isn't it. The latest lapse is because hubby and I started watching Homeland and we have been doing a Homeland marathon most evenings. Not much of an excuse, I know, but there you have it.
Thanks for stopping by my blog!
This card is for my nephew, the second generation of Star Wars fans in the family. I hope he likes it!
A note about the illustration - I drafted it with pencil first, then went over it with Copic Multiliner, and coloured with Tombow markers. I deliberately let the red sabre run out of the lines to get the glowing effect. It's better in real life. Sauron the Scanner is a bit uncooperative. I've added some glitter pen to the sabre, but I think I will add some stickles too. Somehow Tombows need stickles like cookies need milk.
I'll try to get my January challenge back on the rails - it's sort of falling apart, isn't it. The latest lapse is because hubby and I started watching Homeland and we have been doing a Homeland marathon most evenings. Not much of an excuse, I know, but there you have it.
Thanks for stopping by my blog!
Sunday, 19 January 2014
January Challenge #10 "Rock-a-birdie"
Hello! Here's a card I made today, and am going to say it's for the challenge, but the only scraps I used were the watercolour and black paper. The card base is crushed curry (textured) from Stampin' Up.
I needed a 40th birthday card for a drummer and was fresh out of 40th birthday drum stamps so I decided to take matters into my own hands.
I drafted a quick picture on scrap paper (I usually skip this step, regret it, and waste a lot of paper). This resulted in the initial pencil-on-scrap being the best of the versions, so there you go. I can't win for losing here! Lol. Anyway, I drew a little birdie (with his homage to Neil Peart hat) drumming his little heart out. You can click on the picture for a larger image, but I wrote on the drums "The Top 40 Band" in honour of the milestone birthday being celebrated. Once I had sketched it in pencil, I went over it with a black Copic microliner, and then watercoloured the image with Tombow markers. When I was done that, I went over some of the lines to corral some of the stray ink from watercolouring and to emphasize the lines a bit more. Lastly, I accented the drums, cymbals, and hat with stickles (lagoon, gold, burgundy, respectively). On the inside is a stamp that says, "old enough to know better...too old to care!" hee hee hee. The "happy birthday" stamp is from A Muse and is one of my favourites. It's perfect for this layout, which I get a lot of mileage out of.
Here you have it - the perfect solution to a gap in your stamp collection - draw your own picture!
I needed a 40th birthday card for a drummer and was fresh out of 40th birthday drum stamps so I decided to take matters into my own hands.
I drafted a quick picture on scrap paper (I usually skip this step, regret it, and waste a lot of paper). This resulted in the initial pencil-on-scrap being the best of the versions, so there you go. I can't win for losing here! Lol. Anyway, I drew a little birdie (with his homage to Neil Peart hat) drumming his little heart out. You can click on the picture for a larger image, but I wrote on the drums "The Top 40 Band" in honour of the milestone birthday being celebrated. Once I had sketched it in pencil, I went over it with a black Copic microliner, and then watercoloured the image with Tombow markers. When I was done that, I went over some of the lines to corral some of the stray ink from watercolouring and to emphasize the lines a bit more. Lastly, I accented the drums, cymbals, and hat with stickles (lagoon, gold, burgundy, respectively). On the inside is a stamp that says, "old enough to know better...too old to care!" hee hee hee. The "happy birthday" stamp is from A Muse and is one of my favourites. It's perfect for this layout, which I get a lot of mileage out of.
Here you have it - the perfect solution to a gap in your stamp collection - draw your own picture!
Labels:
birthday,
January Stamping Challenge,
sketch,
Tombow markers
Monday, 13 January 2014
January Challenge #8
Hello! Here's is my latest January challenge card. The embossed holly image was in my scrappy treasure box and I dug out the class instruction sheet from Krista's class to turn it from an embossed image into a card. I love Krista's designs, so why try to improve on perfection! Also, I think this was supposed to be the replacement for a card from Krista's class that got used! (Insert gasp of horror here.)
I didn't have quite all the stamps to recreate it exactly, but did the best I could. I also didn't use the colour guide (sssshhhh - don't tell Krista!) and highlighted the berries in a different way so re-oriented the focal panel accordingly.
Well, no stories of hockey or literary legends today. Just another Monday around here. Well, that's not strictly true. There has been a rogue sheet of bubble wrap that has been floating around our house, surprising all and sundry under foot. Tonight was my turn to get "popped" by my children, both of whom got me on separate occasions. Well done girls, though I fear I might have created two little monsters! Or is revenge a dish best served cold.....
I didn't have quite all the stamps to recreate it exactly, but did the best I could. I also didn't use the colour guide (sssshhhh - don't tell Krista!) and highlighted the berries in a different way so re-oriented the focal panel accordingly.
Well, no stories of hockey or literary legends today. Just another Monday around here. Well, that's not strictly true. There has been a rogue sheet of bubble wrap that has been floating around our house, surprising all and sundry under foot. Tonight was my turn to get "popped" by my children, both of whom got me on separate occasions. Well done girls, though I fear I might have created two little monsters! Or is revenge a dish best served cold.....
Tuesday, 7 January 2014
January Stamping Challenge #2
Hello! Here's today's card for the January stamping challenge. I had all the parts finished, it just needed to be taped together. To be honest, it felt a bit like cheating, but it was languishing, incomplete, on my stamp desk, so it was good to get it finished.
This was one I did for a class at Heather's. The flower (Heather's Stamping Haven) is stamped three times and embossed with Golden Sand embossing powder and watercoloured with Tombow markers. The flower is cut out twice and the petals interwoven. Then that part is adhered to the third flower. I embellished with some Gala Glitz (from Art Institute Glitter. That stuff is incredible! shards, gold balls, glitter, chunks, all different colours within the shade - if you don't have some, you should scout some out and you will quickly find it becomes a favourite embellishment). Wow - that last bit is not going to win any grammar awards now, is it! Good thing this isn't the January Good English Challenge!
The flower is resting on a piece of celadon cardstock that has been run through an embossing folder and lightly brushed with Golden Glitz Delicata ink. The mat panel is metallic gold and the card base is a white metallic paper with a gold lustre to it. Gorgeous stuff. It is so shimmery and wonderful.
I love the sophisticated and elegant palette of this card, which is tempered by the whimsical swirls and flowers so it isn't too stuffy.
Thanks for stopping by! Hope you are finding time to stamp.
This was one I did for a class at Heather's. The flower (Heather's Stamping Haven) is stamped three times and embossed with Golden Sand embossing powder and watercoloured with Tombow markers. The flower is cut out twice and the petals interwoven. Then that part is adhered to the third flower. I embellished with some Gala Glitz (from Art Institute Glitter. That stuff is incredible! shards, gold balls, glitter, chunks, all different colours within the shade - if you don't have some, you should scout some out and you will quickly find it becomes a favourite embellishment). Wow - that last bit is not going to win any grammar awards now, is it! Good thing this isn't the January Good English Challenge!
The flower is resting on a piece of celadon cardstock that has been run through an embossing folder and lightly brushed with Golden Glitz Delicata ink. The mat panel is metallic gold and the card base is a white metallic paper with a gold lustre to it. Gorgeous stuff. It is so shimmery and wonderful.
I love the sophisticated and elegant palette of this card, which is tempered by the whimsical swirls and flowers so it isn't too stuffy.
Thanks for stopping by! Hope you are finding time to stamp.
Monday, 6 January 2014
January Challenge #1
Hello! Yesterday I wrote about my new challenge for January, to make something each day from my newly weeded scrap box. Here are the two (!) cards I made today. The little heart panels were cut, stamped, embossed coloured and glittered and all ready to be matted and mounted on a card. Just waiting like Little Orphan Annie for a card to come along and choose them. Since there were two of them, it seemed only right to find them homes at the same time.
The heart images (Sunshine Designs) were stamped and embossed in white, then coloured with Tombow markers and blended. Then, a double-sided adhesive was applied and some warm tone ultra fine glitter was applied. Then the images were left tolanguish ripen in my scrap box.
The other elements of the cards were also from my scraps box. The card bases had been stamped for other projects and not used. The top card has flowery hearts (Penny Black - enchanted garden) stamped in Memento Rhubarb Stalk. The sentiment is from a Stampin' Up set and is stamped in Hero Arts Raspberry Jam. The embossing folder is from a set of two called "Bloom" and I like it for a Valentine's card because it looks like X's made of O's. Get it? XOXO? It's quite shocking how pleased I am by that....
The bottom card has little starbursts (Stamping Bella) stamped in two shades of pink on a Pirouette Pink card base. The mounting panels were also bits of red and pink cardstock from my scrap box and some cream paper from my neutrals scraps. I keep all my neutrals scraps, no matter how small because they are perfect for sentiments and for popped-up accents. I also like having little bits of black, brown and grey for accent strips, etc. I keep them all in an increasingly battered see-through plastic envelope. My coloured cardstock all went into a smallish box that was on-hand. I used to keep all my bits and scraps in separate folders for Stampin' Up, and for Heather's classes, and then "other". Now that I don't do Stampin' Up classes and only have one or two classes for Heather left, I may re-think my cardstock storage and streamline it. In the meantime, a cardboard box is doing the trick for colourful scraps.
Well, day 1 of the challenge and I got two cards done! That should entitle me to a buffer day. I hope not to need it, but Wednesday is looking busy so it might get used sooner rather than later! Since I am in charge of this challenge, I henceforth permit buffer cards to be used as and when necessary. If you are playing along, feel free to shape the rules to suit your schedule, just try to keep to the spirit of the challenge.
The heart images (Sunshine Designs) were stamped and embossed in white, then coloured with Tombow markers and blended. Then, a double-sided adhesive was applied and some warm tone ultra fine glitter was applied. Then the images were left to
The other elements of the cards were also from my scraps box. The card bases had been stamped for other projects and not used. The top card has flowery hearts (Penny Black - enchanted garden) stamped in Memento Rhubarb Stalk. The sentiment is from a Stampin' Up set and is stamped in Hero Arts Raspberry Jam. The embossing folder is from a set of two called "Bloom" and I like it for a Valentine's card because it looks like X's made of O's. Get it? XOXO? It's quite shocking how pleased I am by that.... The bottom card has little starbursts (Stamping Bella) stamped in two shades of pink on a Pirouette Pink card base. The mounting panels were also bits of red and pink cardstock from my scrap box and some cream paper from my neutrals scraps. I keep all my neutrals scraps, no matter how small because they are perfect for sentiments and for popped-up accents. I also like having little bits of black, brown and grey for accent strips, etc. I keep them all in an increasingly battered see-through plastic envelope. My coloured cardstock all went into a smallish box that was on-hand. I used to keep all my bits and scraps in separate folders for Stampin' Up, and for Heather's classes, and then "other". Now that I don't do Stampin' Up classes and only have one or two classes for Heather left, I may re-think my cardstock storage and streamline it. In the meantime, a cardboard box is doing the trick for colourful scraps.
Well, day 1 of the challenge and I got two cards done! That should entitle me to a buffer day. I hope not to need it, but Wednesday is looking busy so it might get used sooner rather than later! Since I am in charge of this challenge, I henceforth permit buffer cards to be used as and when necessary. If you are playing along, feel free to shape the rules to suit your schedule, just try to keep to the spirit of the challenge.
Sunday, 22 December 2013
Christmas card
Hello! Here's this year's Christmas card - kind of ran out of time for more. I'm sure people can relate to that! Normally I try to put "make Christmas cards" on my to-do list so that I can carve out some time for myself in the mad run up to Christmas, but this year I was taking a quilting class, so I was already carving quite a bit of me-time out and didn't feel I could add stamping to that. Well, my class quilt top is done, and I did have a bit of time to make some Christmas cards to send out this year.
I used a design from a class I took at Heather's Stamping Haven from my friend Mary. I loved this card. I made a tiny change - sponged the focal panel instead of using wrinkle-free distress. I thought it would be a bit faster. The ornament stamp is a Penny Black cling stamp from the set "ornately". I coloured it with Tombow markers and misted lightly before stamping. After it was dry, I added some clear Wink of Stella to the ornaments. The snowflake on the black strip is also from the "ornately" set and stamped in Delicata gold. The background panel is stamped in Red Royal (Hero Arts) using a Penny Black background stamp called "christmas story". The whole thing is mounted on a black linen card base and I used Delicata gold to stamp the greeting on the inside. I really love Delicata gold for stamping on dark cardstock - it is crisp and clean and dries right away. Tsukineko people - if you are reading my blog - please, please make us a Delicata silver too! Please!
Well, this blog post must come to an end. It was off to a shaky start since I couldn't log in to Google the way the accounts are set up. So my blogging time did get a bit eaten up by technical contortions.
I hope you get some time to stamp over the holidays. I have high hopes of some quality time at the craft table myself! I will be working on my January class sample for sure - will feature Penny Black stamps in the theme of Love. Perfect for Valentine's Day, anniversaries, wedding cards, etc. I have a lovely little stack of cardstock all picked out and ready for experimenting! But I am not going to rush into post-Christmas thoughts. I am going to enjoy the moment and anticipating the celebrations to come.
Happy Stamping!
I used a design from a class I took at Heather's Stamping Haven from my friend Mary. I loved this card. I made a tiny change - sponged the focal panel instead of using wrinkle-free distress. I thought it would be a bit faster. The ornament stamp is a Penny Black cling stamp from the set "ornately". I coloured it with Tombow markers and misted lightly before stamping. After it was dry, I added some clear Wink of Stella to the ornaments. The snowflake on the black strip is also from the "ornately" set and stamped in Delicata gold. The background panel is stamped in Red Royal (Hero Arts) using a Penny Black background stamp called "christmas story". The whole thing is mounted on a black linen card base and I used Delicata gold to stamp the greeting on the inside. I really love Delicata gold for stamping on dark cardstock - it is crisp and clean and dries right away. Tsukineko people - if you are reading my blog - please, please make us a Delicata silver too! Please!
Well, this blog post must come to an end. It was off to a shaky start since I couldn't log in to Google the way the accounts are set up. So my blogging time did get a bit eaten up by technical contortions.
I hope you get some time to stamp over the holidays. I have high hopes of some quality time at the craft table myself! I will be working on my January class sample for sure - will feature Penny Black stamps in the theme of Love. Perfect for Valentine's Day, anniversaries, wedding cards, etc. I have a lovely little stack of cardstock all picked out and ready for experimenting! But I am not going to rush into post-Christmas thoughts. I am going to enjoy the moment and anticipating the celebrations to come.
Happy Stamping!
Wednesday, 30 October 2013
October Stamping Challenge #15
Hello! Here's another quick tag for my October stamping challenge. I was experimenting with different ways to use this holly stamp (Penny Black) combined with Tombow markers so I cut this one out and mounted it on some scraps of paper leftover from layout auditions for my November class. The focal image here is embossed in black, watercoloured with Tombows and accented with stickles and Wink of Stella brush pen. I used my new Pine stickles - Ranger has some new colours out. They have needed a new green for a while - Lime Green and Crystal are fabulous, but I was ready to have something that could go on darker colours. I really love this new colour and can't wait to see the rest of them when Heather gets them in.
Thanks for stopping by. One more day of my stamping challenge!
Thanks for stopping by!
Thanks for stopping by. One more day of my stamping challenge!
Thanks for stopping by!
Labels:
October Stamping Challenge,
Penny Black,
tags,
Tombow markers
Tuesday, 29 October 2013
October Stamping Challenge #14
Hello! Here's my latest stamping challenge project - a quick little tag. I used some leftover parts from my explorations in making my samples for my November class at Heather's Stamping Haven. The class will be on November 30 from 2-5 pm. The class projects are show below and my class is called Wink of Christmas because I have been trying out the Wink of Stella glitter brushes! They are a lot of fun and add a different sort of shimmer than stickles or twinks. I quite like them. My class also uses a great set of Christmas stamps from Penny Black. Hope you can join us!
The other stamping things I have been doing this weekend are Krista's classes! I haven't taken a picture (yet) of all my projects, but you can see them on Krista's website here. If you click on one of the thumbnails, it expands the picture to a see-able size and you can scroll through. We had such a good time! Krista teaches a variety of colouring techniques: Tombows, Distress markers, Copics, and Inktense pencils. It was a blast and the other ladies always make it such a special time. A great big thank you to Krista, Heather, and all the other ladies for a wonderful weekend!
Well, all this stamping goodness is the reason I have been away from my stamping challenge. I gave myself a pass since I was spending so much time doing other sorts of stamping. I think my family might have really rebelled if I had spent any more time stamping and blogging!
Well, time to dash off to work here. Hope you had a good weekend too and found some time to get inky!
Happy stamping!
Friday, 18 October 2013
October Stamping Challenge #10
Hello! Here is the latest installment of my October Stamping Challenge. This one was made from a left over class kit and has been sitting out, waiting for a spare moment to be coloured up. The stamp is Sunshine Designs (Flower Cluster) and stamped on shimmer cardstock and embossed in gold. I coloured it with Tombow markers and blended it with a paintbrush. I added some liquid pearl accents in Avocado (vines) and Lemon Yellow (round flowers) and stickles (Fruit Punch and Yellow) to finish it off. The accent panel was embossed with a pretty spiral using a folder from a set of two called Twirl. It has been my go-to set lately - very versatile.
This is Krista Schneider's technique, and she will be in Ottawa to teach her Tombow, Copic, multimedia, Inktense and Distress classes starting Oct 24. Call Heather at Heather's Stamping Haven to register. These are fantastic classes!
Thanks for stopping by!
This is Krista Schneider's technique, and she will be in Ottawa to teach her Tombow, Copic, multimedia, Inktense and Distress classes starting Oct 24. Call Heather at Heather's Stamping Haven to register. These are fantastic classes!
Thanks for stopping by!
Tuesday, 23 July 2013
Golden Anniversary
Thanks for stopping by! Hope you're enjoying your summer/winter (don't want to be hemispherically biased here!). We sure are - lots of swimming and barbecues and generally enjoying the break in the weather. (We had a terrible heat wave last week.) I've been doing some jamming and some quilting and some stamping and some knitting and some crocheting. Good times!
Happy Stamping!
Saturday, 14 April 2012
Mastering Twinks & Scrap Sunday on Saturday
Hi! Here's a quick stamped project to show you. I was cleaning off my desktop (!) to make room for my large craft sheet, and I came across this coloured image. I think I'd done it for my calendar class and switched to a poppy image for the calendar page. This little beauty needed its own home! I had a few other scraps that I incorporated into the design, and presto-change-o, this card was done! The image (Heather's Stamping Haven) is embossed in black on watercolour paper and coloured with Tombow markers. The sentiment is a rub-on, and the light green panel is embossed with the Tim Holtz brick wall and enhanced with some iced spruce distress ink. So, here we have a Scrap Stash Sunday card on Saturday. I'll slide it in on a couple of technicalities: I can't actually remember what day I made it, so it might very well have been a Sunday. Also, it's Saturday morning here so it must surely be Sunday by now in Australia, if not Monday or Tuesday.
In other news, I signed up for this on-line class, Mastering Twinkling H20s, and so far it looks great. I have read over the first lesson, but not done the exercises. The exercises look like a lot of fun. I have always loved my twinks, and I'm looking forward to learning more about them. I'll try to post my exercises on the class's Flickr group, and I'll post a link here if the group is an open forum. Now it's off to feed the kiddies and get ready for my class at Heather's this afternoon. I might even try to get the kids' hair cut this morning, but we'll see how the time goes.
Have a great weekend!
In other news, I signed up for this on-line class, Mastering Twinkling H20s, and so far it looks great. I have read over the first lesson, but not done the exercises. The exercises look like a lot of fun. I have always loved my twinks, and I'm looking forward to learning more about them. I'll try to post my exercises on the class's Flickr group, and I'll post a link here if the group is an open forum. Now it's off to feed the kiddies and get ready for my class at Heather's this afternoon. I might even try to get the kids' hair cut this morning, but we'll see how the time goes.
Have a great weekend!
Saturday, 31 March 2012
Creative Chemistry Tags (Day 2-6)
Hello! Here's what I've been doing this afternoon. I've been taking Tim Holtz' Creative Chemistry on-line card class (link here). It's been wonderful and I have really learned a lot. He goes into a lot of detail and the techniques are a lot of fun. Here are my efforts so far - definitely still in the learning phase. I did go so far as to clear off a big space on my stamping desk so I could get all Tim Holtzy and lay out my craft sheet and have my heat tool right to hand. I don't think I need it there all the time, but it was handy for drying between applications, etc. I won't go into detail about the techniques, but I sure did have fun!
![]() |
| Day 2 (l-r): Blended Distress/Spritz & Flick, Brushless Watercolour, Wrinkle-Free Distress |
![]() |
| Day 3 (l-r): Alcohol Ink Agates, Archival Resist, Stamping on Embossing Folder |
![]() |
| Day 4 (l-r): Watercolourng with Re-inkers; Layered Misting, Custom Stamp Pad |
![]() |
| Day 5 (l-r): Stained Kraft Resist, Stamping with Stains, Marbled Stains |
![]() |
| Day 6 (l-r): Watercolour with Markers, Blending with Markers, Stamping with Markers |
Saturday, 21 January 2012
Birthday Card
Hello! Here's a card I made today for my brother's birthday. He's an avid video gamer, so I thought this would be a good card for him. It's a Sunshine Designs image, one of a set of four. I stamped it on watercolour paper and embossed it, then watercoloured it with Tombow markers, and accented with Stickles. I added in some sound lines and Batman-style "pops" "bzzts" and "zaps" for the sound effects. The background paper is from the Marrakesh pack of BasicGrey accent papers and the background stamp is another Sunshine Designs cube. The card base is Mellow Mossand I added a final accent of dimensional pearls (Ranger) in Denim. A quick card that was good for using some paper scraps. The longest time is figuring out the layout. It's also quicker to decide on the paper and then choose the marker colours. Edited to add: This is more vibrant in real life but Sauron the Scanner hates me and refused to cooperate. I tinkered with my photo editing software to the full extent of my patience to no avail. You'll just have to picture it brighter :-)
Thanks for stopping by!
PS A huge thank you to the ladies who came out to my calendar class at Heather's Stamping Haven last week. I had a wonderful time!
Thanks for stopping by!
PS A huge thank you to the ladies who came out to my calendar class at Heather's Stamping Haven last week. I had a wonderful time!
Saturday, 7 January 2012
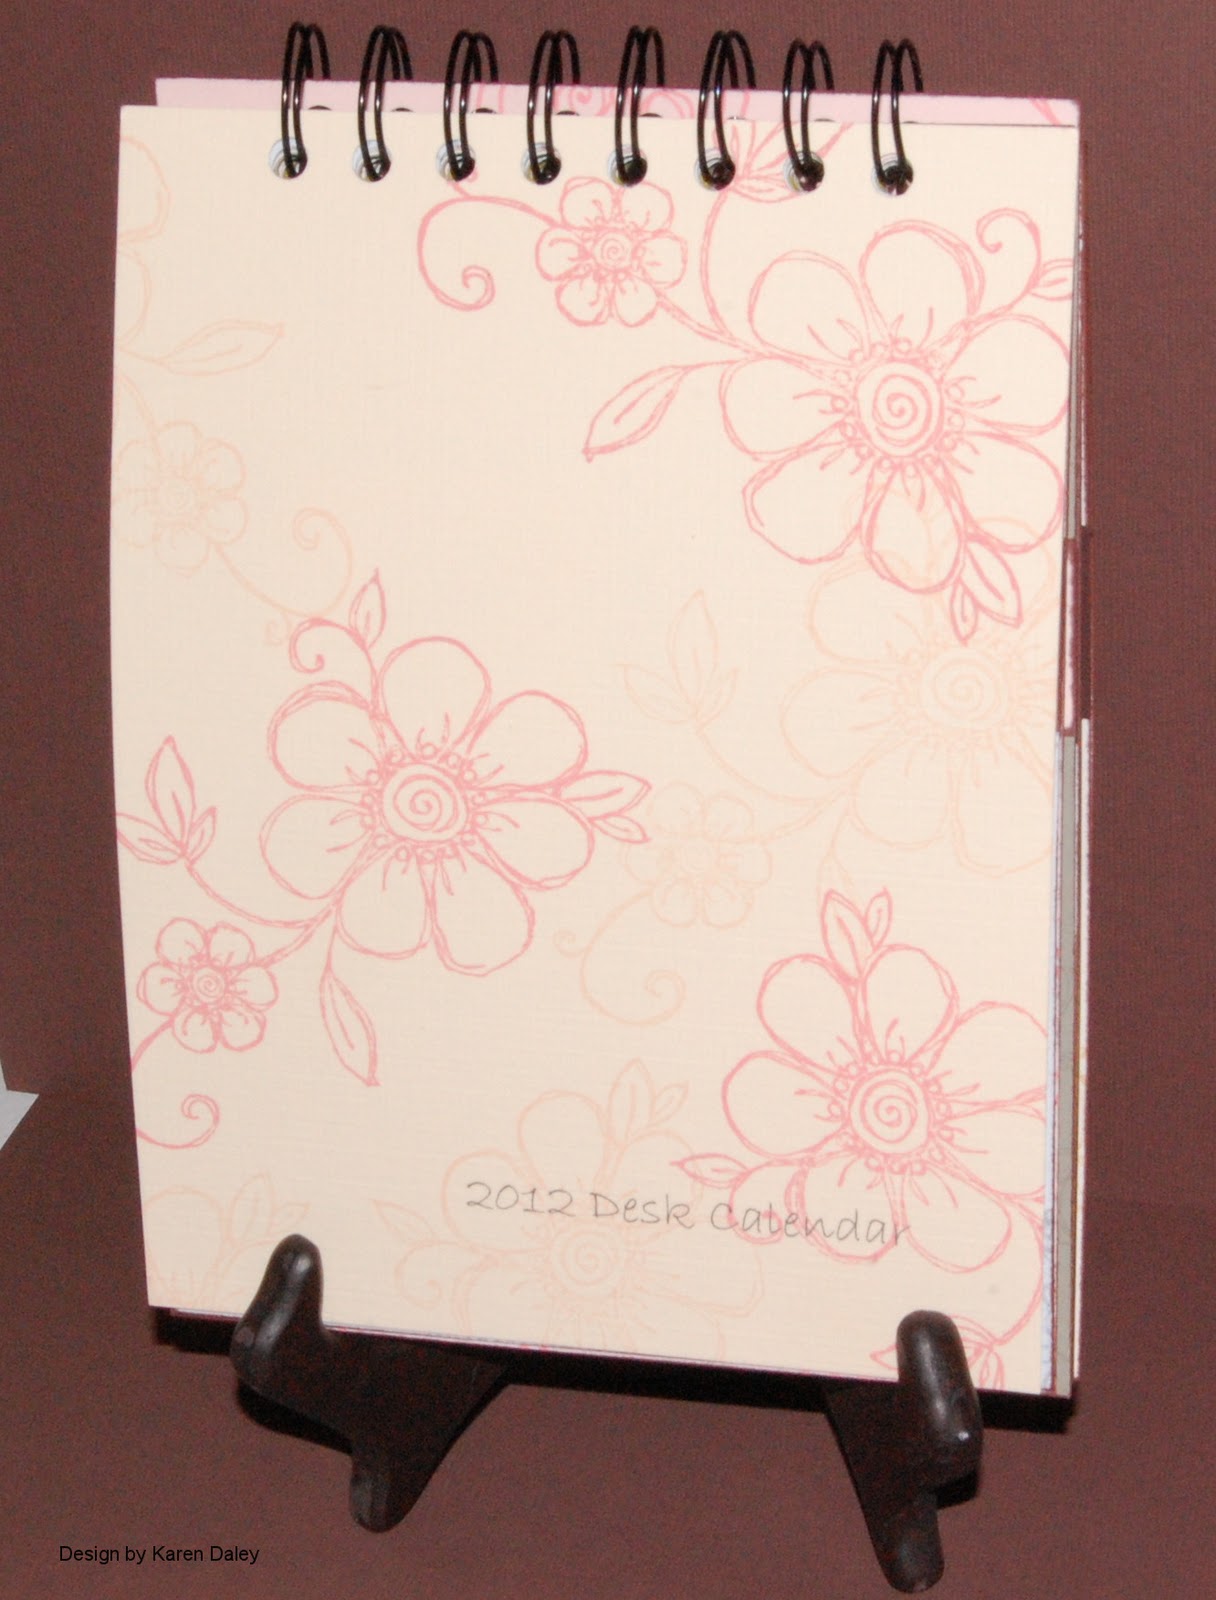
Calendar Class
![]() |
| Calendar - closed |
In the morning, we will do the images and you will learn the essentials of Krista Schneider's popular technique for watercolouring with Tombow markers. In the afternoon, we will make the calendar pages and assemble the calendar.
![]() |
| Calendar open to January 2012 |
![]() |
| Calendar Pages |
I really had fun making this calendar and I would be hard pressed to pick a favourite page. I think I could narrow it down to three contenders: the bunny, the witch, and the poppy. I used Sunshine Designs and Heather's Stamping Haven images as they lend themselves so well to the technique, but also because there is tremendous variety to choose from, seasonal and floral and birds...gorgeous. This calendar also has two bonus pages for 2013, which presented some challenges to DH to understand (in his engineer's world, calendars have 12 months you see). I said it was because years are only randomly selected points in time, roughly timed to include one trip around the sun and any old pope can make one up. Plus, we are making this later in January, so the two extra months are to make up for that. Also, a calendar that will go to February will allow people to purchase their 2013 calendars at deep discounts in February, thus offsetting the cost of the class. He remained unconvinced. I, on the other hand, thought it was great to be able to include the extra months, which is the whole reason you *make* things, not buy them, because then they get to be how *you* want them.
Hope to see you at Heather's on January 14th! It's going to be a great class and a lot of fun.
Sunday, 18 December 2011
Christmas Card
Hello! This will be a quick post before we dash off to church. Today is the Advent Pageant - always a good time.
I was "cleaning up" the stamp room yesterday and found two of these trees stamped and embossed on watercolour paper and decided to "whip up" another two Christmas cards. I had thought I was done Christmas cards, but those were only the mailing ones. I realized I needed another 30 or so...
I had been doing a lot of red and green cards so I decided to try something else and used bluey greens, oranges and pinks here. I used Tombow markers and blended them with a paint brush. I like it for the most part, but I think the traditional colours are still my favourite. Still, it was fun to get out the new Stickles that don't get much use. The Eucalyptus, Mystic Green and Tropical Tangerine were *perfect* here and this card has more sparkle and glitz than a Vegas showgirl.
Well, I must dash and feed Thing 2. (Thing 1 is at a sleepover birthday party.)
Thanks for stopping by!
PS. Dear Santa, Please bring me a clean and decorated house, some tins of home baking (including Granny Borrowman's gingerbread please) and some clean and folded laundry. Thank you!
I was "cleaning up" the stamp room yesterday and found two of these trees stamped and embossed on watercolour paper and decided to "whip up" another two Christmas cards. I had thought I was done Christmas cards, but those were only the mailing ones. I realized I needed another 30 or so...
I had been doing a lot of red and green cards so I decided to try something else and used bluey greens, oranges and pinks here. I used Tombow markers and blended them with a paint brush. I like it for the most part, but I think the traditional colours are still my favourite. Still, it was fun to get out the new Stickles that don't get much use. The Eucalyptus, Mystic Green and Tropical Tangerine were *perfect* here and this card has more sparkle and glitz than a Vegas showgirl.
Well, I must dash and feed Thing 2. (Thing 1 is at a sleepover birthday party.)
Thanks for stopping by!
PS. Dear Santa, Please bring me a clean and decorated house, some tins of home baking (including Granny Borrowman's gingerbread please) and some clean and folded laundry. Thank you!
Labels:
Christmas,
The Artful Stamper,
Tombow markers,
watercolouring
Saturday, 10 December 2011
Holy Holly Batman!
Hello! Here's my card for the December challenge at Inkurable Stampers, theme of Holly.
Well, here's where my near fetish for holly stamps came into its own. I used a Penny Black brush stroke holly stamp for the main image, a Stamping Bella holly stamp for the background, and on another version of this card I used the Heather's Stamping Haven solid and open holly stamps.
I started off by using a layout and technique idea from my stamping friend Mary, but changed up the colour scheme a bit. I coloured a panel of watercolour paper with Tombow markers in shades of light yellow, light blue, and many greens, just scribbling on randomly. Then I spritzed generously with water and let it blend around by itself, getting a fair bit of green on my hands. (It washes off eventually. I don't want to say how long because it all depends on how much you wash your hands. I guess if you are neither a compulsive hand-washer or a germophile, it will wash off in about a day, unless you are very neat and don't get any on your hands in the first place. If you are that person, I would watch for other miracles too, like Virgin Marys in your watercolour puddles.) Ok, let the watercolour panel dry, and help it along with a heat tool if you want, once it's stopped sopping and dripping. I set it aside to drip onto my crafting rag, which helped contain the mess, and added a cheerful green to the rag. Once it was dry, I stamped with the Stamping Bella solid holly in Evergreen Bough distress ink, and also some music (Cornish Heritage Farms) in the same green. Then I ironed it to seal the deal and stamped the Penny Black brush stroke holly in black and embossed in black. Next was the message (from the Darkroom Door Dear Santa collection), but I wished afterwards I'd embossed that too. I accented it with my sparkle pen, but I still wish I'd embossed it - next time. The card base is a medium gray linen, stamped with the same Penny Black holly in Ice Jade chalk ink. The front side of the card is cut short by about 1 1/4", and a gold edge strip applied. On the inside of the card is a black linen strip, stamped with my current favourite stamp, a scripty background from Impression Obsession. I am using that stamp on everything. Everything. It works everywhere! It is the little black dress of stamps. Not that I have ever had a little black dress, or needed one, but I use the term to indicate a wardrobe staple, that can be dressed up or down, go uptown, downtown, day to evening with the right accessories, etc. Only the stamp version is much more gratifying and requires neither pantyhose or high heels. Once everything was all put together, I put some Patina stickles on the holly leaves and some Xmas Red and Candy cane stickles on the berries. Yay holly! Yay stamps! This will be a quick one to do a batch of, maybe later tonight.
Thanks for stopping by!
Well, here's where my near fetish for holly stamps came into its own. I used a Penny Black brush stroke holly stamp for the main image, a Stamping Bella holly stamp for the background, and on another version of this card I used the Heather's Stamping Haven solid and open holly stamps.
I started off by using a layout and technique idea from my stamping friend Mary, but changed up the colour scheme a bit. I coloured a panel of watercolour paper with Tombow markers in shades of light yellow, light blue, and many greens, just scribbling on randomly. Then I spritzed generously with water and let it blend around by itself, getting a fair bit of green on my hands. (It washes off eventually. I don't want to say how long because it all depends on how much you wash your hands. I guess if you are neither a compulsive hand-washer or a germophile, it will wash off in about a day, unless you are very neat and don't get any on your hands in the first place. If you are that person, I would watch for other miracles too, like Virgin Marys in your watercolour puddles.) Ok, let the watercolour panel dry, and help it along with a heat tool if you want, once it's stopped sopping and dripping. I set it aside to drip onto my crafting rag, which helped contain the mess, and added a cheerful green to the rag. Once it was dry, I stamped with the Stamping Bella solid holly in Evergreen Bough distress ink, and also some music (Cornish Heritage Farms) in the same green. Then I ironed it to seal the deal and stamped the Penny Black brush stroke holly in black and embossed in black. Next was the message (from the Darkroom Door Dear Santa collection), but I wished afterwards I'd embossed that too. I accented it with my sparkle pen, but I still wish I'd embossed it - next time. The card base is a medium gray linen, stamped with the same Penny Black holly in Ice Jade chalk ink. The front side of the card is cut short by about 1 1/4", and a gold edge strip applied. On the inside of the card is a black linen strip, stamped with my current favourite stamp, a scripty background from Impression Obsession. I am using that stamp on everything. Everything. It works everywhere! It is the little black dress of stamps. Not that I have ever had a little black dress, or needed one, but I use the term to indicate a wardrobe staple, that can be dressed up or down, go uptown, downtown, day to evening with the right accessories, etc. Only the stamp version is much more gratifying and requires neither pantyhose or high heels. Once everything was all put together, I put some Patina stickles on the holly leaves and some Xmas Red and Candy cane stickles on the berries. Yay holly! Yay stamps! This will be a quick one to do a batch of, maybe later tonight.
Thanks for stopping by!
Saturday, 25 June 2011
Make a birthday splash

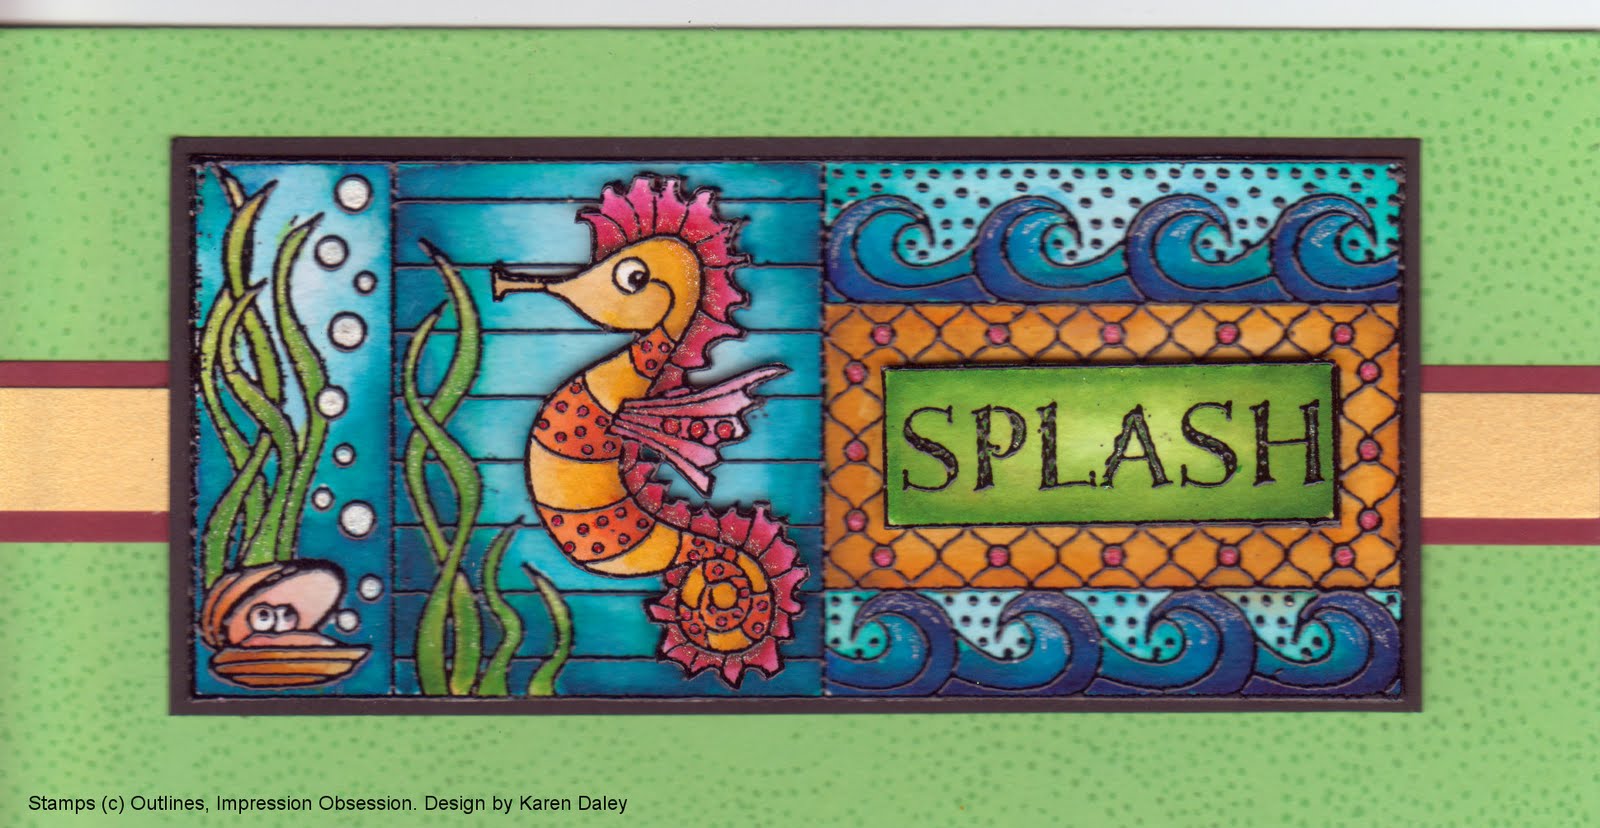
Hello! Here's a card I made up over the past couple of days for a friend of my daughter's. She's having an ocean themed birthday, so I thought I would continue the theme with the card. The main stamp (Outlines) was stamped twice on watercolour paper and embossed, and coloured in with Tombows and blended. I tried to keep to the same colours on all the panels, but some are lighter and darker, just adding more markers to deepen colour if necessary. The card base (3 1/4 x 6 1/2") is a bright green (retired Stampin' Up), with a red and metallic yellow band. I used a background cover-a-card stamp (Fluff, Impression Obsession) on the background to echo the dots on the image. I didn't have time for stickles to dry before this card went to the party so I added glitter with my Sakura pens. There was lots of shine from the embossing too. I did two bits for the "splash" and the seahorse, cut out and popped up the second ones for dimension. The scan doesn't quite do it justice - in real life it's very vibrant. That's what I really love about the Tombows. Now if they'd only make a nice navy.....
NSR: It's strawberry season here and we had lovely strawberries and whipped cream and angel food cake for dessert tonight. Yum yum. I hope to get out soon and pick some to turn into jam. I didn't get to last summer, so I hope to remedy that this year. Also, thank you for the well wishes about the new job. I'm staying with the same overall organization, but moving to a different department doing a different type of work. So a huge change. It's going to be a big learning curve, but I think it will be good for me to try something new. I'll also be downtown, closer to interesting places to poke around in over lunch time, and lots of nice places to try for lunch. Also a great organic bakery between me and the bus stop (could be hazardous!). So lots to do between now and then, new clothes, new glasses (need new prescription), clean out old office, do handover, finish up what I can, farewell lunch, and all that sort of thing. It will be hard to say goodbye - many wonderful colleagues and friends there and many happy memories.
Thursday, 23 June 2011
Birthday card

Hello!
Here's a card I made last night for DD1's dear friend's birthday. The focal image (Heather's Stamping Haven) is stamped and embossed on watercolour paper and coloured with Tombows using Krista Schneider's watercolouring technique. It's matted on black, with a little border doodled in. The card base is stamped with a daisy (Stamping Bella) and accented with patterned paper (Basic Grey) and Adirondack dimensional pearls in Butterscotch. The focal image is liberally accented with stickles, which really adds pop in real life. Nothing too out of my comfort zone here, but that's the way I like it right now. I'm on the brink of a significant change in jobs, so I'm way out of my comfort zone there. Some happy colouring time was just what I needed.
Thanks for stopping by! Happy stamping :-)
Subscribe to:
Posts (Atom)